In April I started to collect black photo frames and photos for a grouping for my dining room wall. Yes, I do realize that was SIX whole months ago. Mostly what took so long was working up the nerve to start it. I knew that it would be quite a project and I was really concerned that it would come out terrible and all I would have to show for my efforts was a wall that looked like swiss cheese! Well, my fears were unfounded because I LOVE the way it turned out!
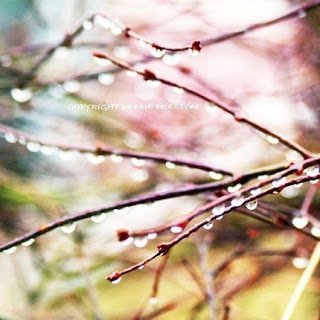
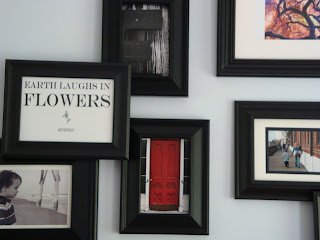
My first photos were these from Shaded Memories aren't they fabulous?
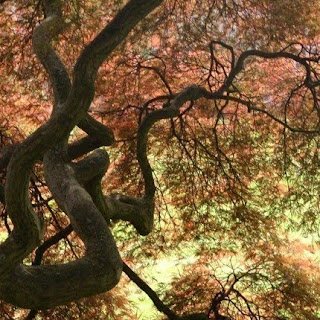
Then I found these beauties from Kimberly of Mimi Charmante She is so talented and has a great blog too!
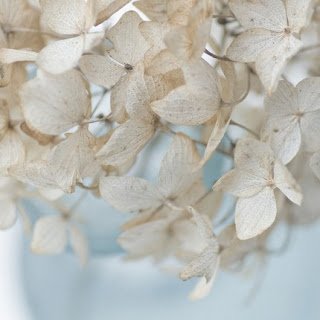
Then I found these (among many others) from Layla of Lettered Cottage Art. I especially love the red door photo.
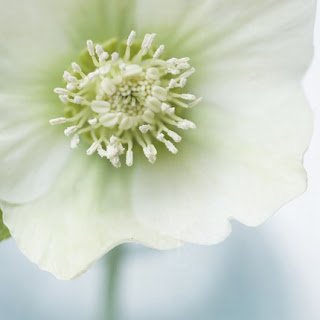
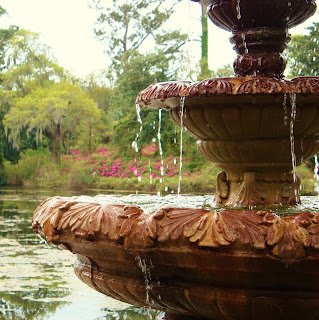
I took this photo, below, myself with a little help from my friend, Gerry. It was taken at Airlie Gardens. If you are ever in Wilmington, you should take a couple hours to tour their amazing gardens!
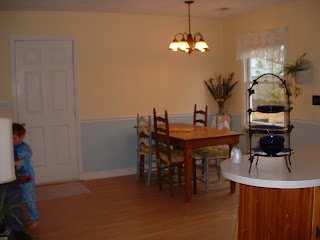
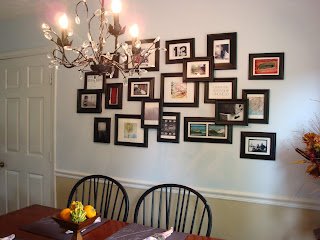
So yesterday I was feeling down because it was my girl's birthday and she is now living 800 miles away. I decided to tackle this project that has been waiting so patiently for me. This is an older picture. Since it was taken we have repainted, replaced the table and chairs with ones that actually match and replaced the light fixture with a new chandelier.
First I gathered the frames and the above photos along with some family favorites. I placed all the photos in frames and made white mats for some of them out of white card stock. Then I laid them out on the dining room table, then I rearranged them, then I rearranged them again, and again, you get the idea! This part took me literally HOURS! Because I have such a varied mix of photos I had to be careful that I didn't bunch the family photos together and that I evenly spread out the color photos among the black and white photos, etc. Finally I was ready.
I cut scrapbook paper to the size of every frame and place them on the wall in their correct place (another hour). I don't have pics of this part because Hubby had the camera at Cub Scout camp. Sorry!
Then we had dinner (I needed a break by this point). Then I re-spaced some of the papers and then started hanging the photos. This was the easiest part of the entire process.
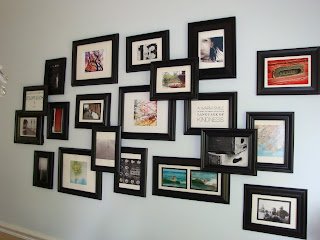
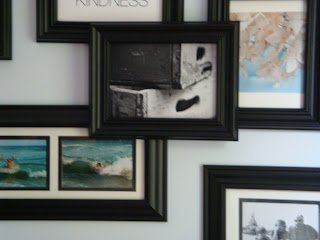
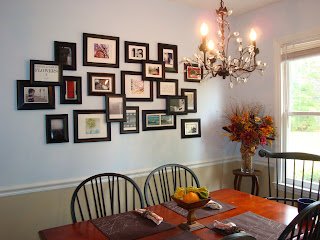
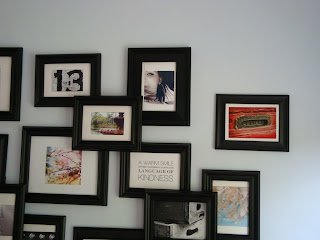
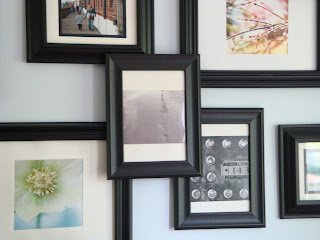
See how I have four "layered" on top of the others? Well, just before I got to those last four I looked at the wall and almost cried! It looked like I just randomly hung them! It was a mess! I thought I was going to be up all night filling the nail holes and repainting the wall! Then I decided to finish with the layering and then decide if all my work for for naught. I am so glad that I didn't give up because those four really brought it all together.
I am so happy with it! And so happy that it is all finished!
Now what project can I fret over for the next six months?
I am participating in BNOTP's Metamorphasis Monday and ASPTL DIY Tuesday. Check out all the other cool projects!


26 comments:
Very nice job on the photo wall grouping...I know you said it took hours but the result was worth the effort!
Jane
I've seen a few photo walls, but I really, really like yours. I love that your frames overlap. It gives it a 3-D, texture, happiness feeling. it makes it more real to me!
That is SO cool!! Very unique and well worth the time you put into it. It is just so clever!
Suzanne
Love the layering!
I love the way the pictures look on the way, you did a very good job placing them, I am a new follower of yours and will return to see more...Come for a visit
Those are beautiful pictures, and I love the collage you created! Great job!
WOW! I love it! There are so many beautiful images there. Great job, and thanks for inspiring me this morning! :-)
Layla
I love this idea.
How did you hang the photos that are further from the wall? On a longer nail?
Leen - it turned out beautifully! What an amazing group of images and the all-black frames are fabulous~
Great job my friend,
xx
Wow! You've done an outstanding job. Every detail is perfect. It is beautiful.
I admire your courage in tackling this project! The outcome is wonderful. I do like the layering. Great idea.
Hi!
Just wanted to comment on your wall grouping-- it is fabulous and I am studying it for future reference!
Very creative. Great, great job.
Amy
I think it looks fab! You're brave to tackle such a big wall, but your efforts sure paid off. :O) Good on ya!
peace.
I love the way it turned out! I featured a similar project last week. I especially like how you layered the frames, great idea!
The photo wall turned out so beautiful. I love all the images and how you layered them.
The collage looks great!! And don't even get me started on having a teen age daughter!! I hope it comes SLOWLY! I nominated you for a Blog Award!
check it out here:
http://doubledelightdesigns.blogspot.com/2009/10/awww-shucksyou-shouldnt-have.html
Tamera
What a clever idea of where to find photos. Love the results.
This is so good, gives me courage. I have a similar project on my mind, and for much longer than six months. But since I would have to drill holes (nails don't go into our concrete walls) it is even scarier. Still looking for a way to do it that doesn't involve a powertool. I love your idea about the layering, never saw that before!
wow, that looks phenomenal! i've never seen frame clusters where you actually overlap the frames but that looks really cool and interesting! plus the photos are gorgeous. nice work :)
I agree with the others - the layering is WONDERFUL. I, too, am curious - how did you hang the layered ones? Did you actually attach them to the frames they overlap?
I LOVE this! How did you do the layered ones?
I LOVE it! Doesn't look random at all. And I so know how you feel about something taking so long drives ya to tears. I want to know how you hung the layered ones also!
Thanks everyone for the nice words!
To answer the questions about the layering, PB sells these
http://www.potterybarn.com/products/frame-riser/?pkey=call-wall-decor-mirrors
But I just used longer nails for those frames. I also made sure that the frames under the layered ones were the same thickness as each other since the tops ones rest on the bottom ones.
If you need clarification on that shoot me an email and I will elaborate :)
Overlapping frames.... oh may... how 'Not Martha' ... Good for you!
I LOVE THIS! How did you get them layered onto each other like that! it looks hard!?
Love this grouping. I was thinking of doing something like this with the photos my children entered in the state fair. I am definitely going to try that layering technique- fantastic.
Post a Comment